Do you suffer from sick building syndrome?
It is well known that staying in a home for a long time that does not meet safety and quality standards can lead to health problems. But did you know that there is a name for this? This is called sick building syndrome. In this article, we'll tell you how to recognize this phenomenon, and how to avoid the unpleasant consequences of this syndrome.
What is sick building syndrome?
The name says it all: sick building syndrome is a term used in situations in which residents or users of a building suddenly experience all kinds of health problems that are due to nothing but the building. In other words, just by being in the building, the inhabitants get sick.
The term was coined by the World Health Organization, which released a research report in the 1980s with some curious results. They found that about 30% of all new and renovated homes make residents sick. In doing so, they made the important observation that sick building syndrome usually does not occur in just one individual, but in a group of people. Thus, it does not only manifest itself in individuals, but often affects several people in the same building.
The most common symptoms of sick building syndrome
The symptoms of sick building syndrome can be very diverse and are generally considered non-specific and mild, but they can still be experienced as unpleasant. They show similarities with the symptoms of an allergic reaction or long-term work stress.
Below you will find an overview of the most common complaints:
- (Heavy) fatigue,
- Dizziness
- Nausea
- Dry or stinging eyes
- An irritated nose and/or throat
- Coughing and/or sneezing
- A nasal cold
- Fever
- Difficulty breathing and a feeling of pressure in the chest
- Headache
- Dry and/or itchy skin
- Result
- Concentration problems and reduced productivity
- ...

Precisely because the symptoms are so general, it is difficult to determine whether they originate from sick building syndrome. It is only when several people in the same building experience these complaints at the same time that you can speak with more certainty of sick building syndrome.
The causes of sick building syndrome
Sick building syndrome can occur in one particular room, or the entire building can cause you to get sick. Some of the most common causes are poor or lack of ventilation, high humidity due to moisture problems or chemical contamination from building materials, for example. Insufficient daylight can also lead to the health problems described above.
Solving sick building syndrome
The causes of sick building syndrome do not disappear on their own.
- Regularly monitor indoor air quality and humidity to identify and address potential issues. Air quality monitors can help you with this.
- To achieve good air quality, ventilation is a must. Make sure there is adequate ventilation in the building. This can be done simply by opening a window or door on a regular basis, or you can delegate this task to a ventilation system.
- If you notice that the humidity remains too high and does not decrease, it is advisable to call in a moisture expert. This expert will be able to identify the moisture problem and suggest the most appropriate solutions to address the problem.
- Only use building materials and furniture that do not emit toxic substances. Choose eco-friendly and sustainable materials whenever possible.
Do you have a moisture problem? Our field engineers are true experts when it comes to this moisture problem. Contact AquaConsult now for a no-obligation free consultation.
Request more information and brochure
Answer the questions below and get more information and our brochure. Would you like to have the cost price calculated? Please indicate this clearly in the text field below and we will do the necessary.
Treating rising damp yourself: here's how to do it
Are you suffering from damp walls? You may be dealing with rising damp. It is important to address this problem to prevent further damage. Fortunately, it is often possible to treat rising damp yourself. In this article we share all the essential information about this.
Rising damp, a moisture problem you'd rather not have
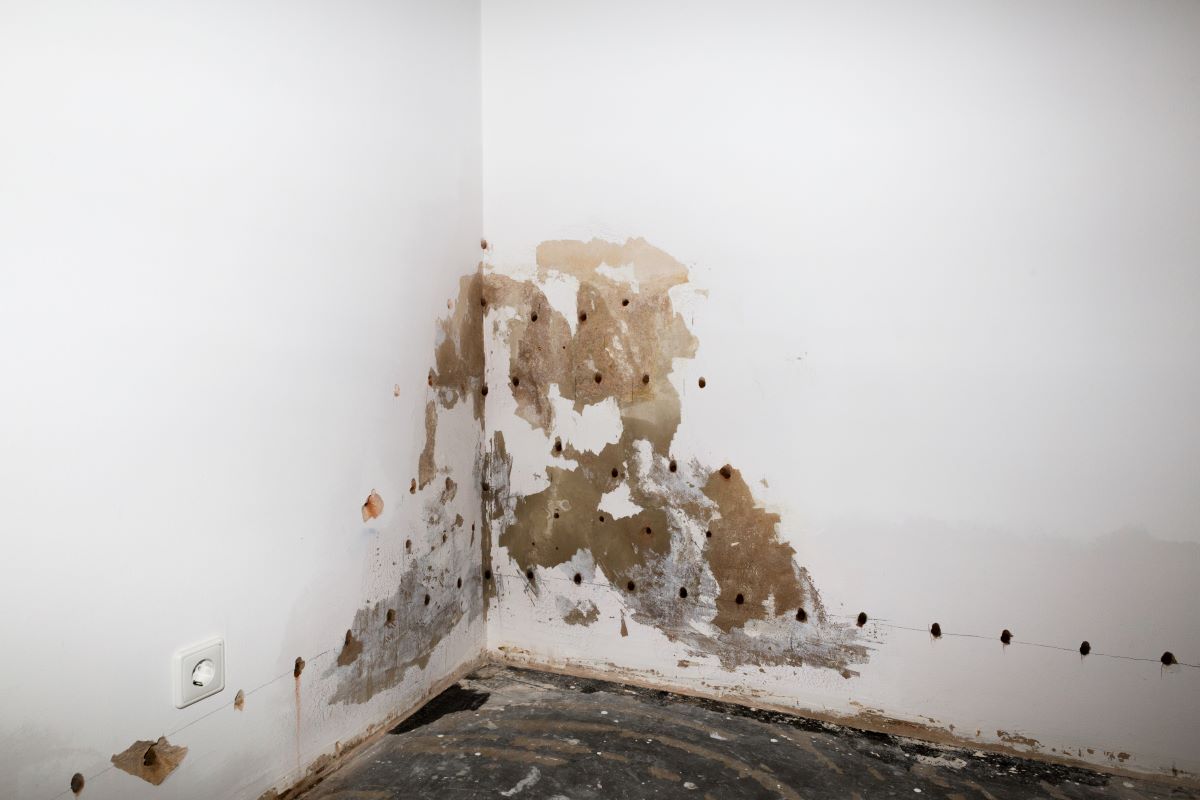
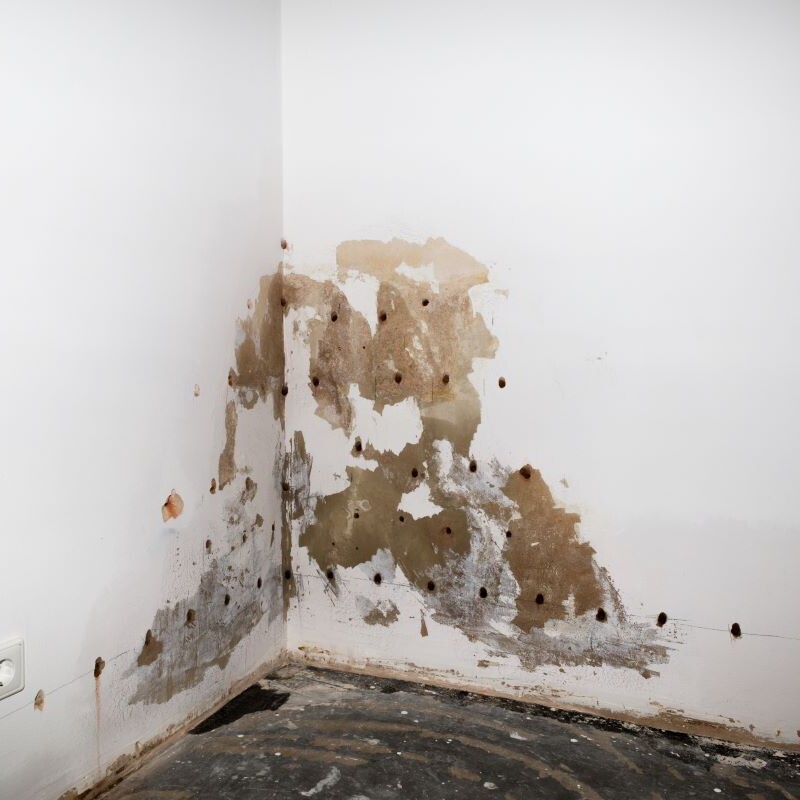
Rising damp is caused by groundwater being absorbed by the foundation and walls, this because there are problems with the water barrier in the wall. This leads to moisture spots that are mainly visible close to the ground, but the moisture can also spread further into the wall. Both interior and exterior walls can suffer significant damage as a result
This moisture problem can occur in both old and new homes, and it brings with it all sorts of negative consequences. Some examples include:
- Loose plaster, mold or spots on the walls
- Structural damage to the home
- Health problems, mainly respiratory
- A significantly higher energy bill
- ...
So it is very important to treat rising damp at its base. It is often possible to treat the rising damp yourself.
Treating rising damp yourself with wall injections
When you want to treat rising damp yourself, there is usually only one method effective: injecting the wall. This involves drilling holes in your wall and then filling (read: injecting) them with a moisture-resistant gel. That gel then spreads deep into the pores of the wall. The chemical components of the gel react with the elements in the wall, resulting in a hydrophobic layer that blocks rising moisture.
Step by step treat rising damp yourself
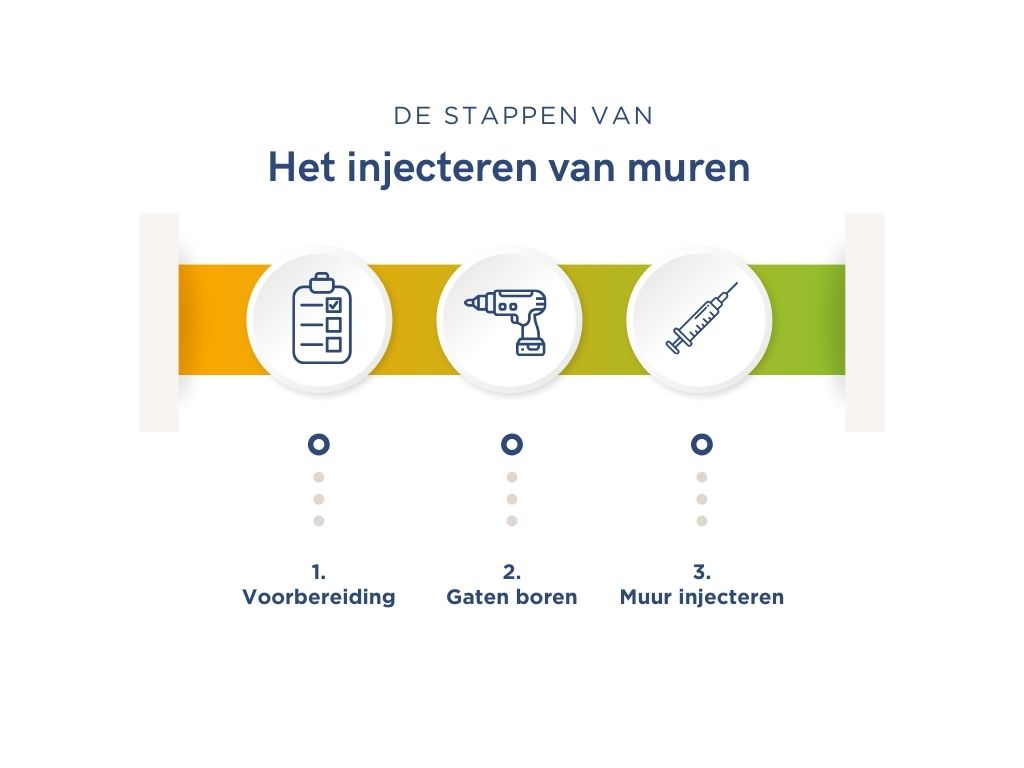
Step 1: the preparation
A prepared man is worth two. It's no different here. These are some preliminary steps it's best to take before treating rising damp yourself:
- Make sure you are certain that the cause of the damp wall is rising damp. This is because each moisture problem requires a specific approach to moisture control. If the damp wall is caused by another factor, injecting the walls will not be effective in solving the problem.
- Further remove any damaged plaster to about 20 centimeters from the affected area.
- Repair all holes and cracks with a suitable repair mortar.
- Finally, make sure the substrate is completely dust-free.

Step 2: drilling the holes
After the preparation, it's time for the real work: drilling the holes in the wall. Holes should be drilled along the full length of the floor. The holes should be spaced 10 centimeters apart each time, and they should come just above the floor pass. It is recommended that you mark off the holes first.
After determining the locations of the drill holes, measure the thickness of the wall to be treated. The drilling depth should be about 90% of the wall thickness, often this amounts to 2 inches less than the thickness of the wall. To actually drill the holes, it is recommended to use a long 12-milimeter stone drill bit. After drilling, the holes should be carefully cleaned with a vacuum cleaner to remove drill cuttings.

Step 3: injecting the wall
After drilling the holes, you can inject the walls. You fill the holes with the damp-proofing agent, and you do this using a caulking gun or spray gun. Do this as follows:
- Insert the syringe hole as deeply as possible.
- Start injecting in the back, moving in a smooth motion to the entrance of the hole. Stop about 1 centimeter from the wall surface.
- Repeat for all drill holes, making sure that each drill hole is completely and evenly filled.
- Use the inches left over to seal the drill holes with cement mortar. This provides a nice finish.
A handy tip to remember: if emulsion gel is spilled, it is advisable to clean the spill immediately with warm soapy water. By doing this quickly, you prevent the emulsion gel from drying up and becoming more difficult to remove.

The pros and cons of treating rising damp yourself
There are some advantages to injecting your wall yourself. For one, you can cut costs, and you can completely control when you inject your wall. You also have more control over the entire process and can closely monitor your wall and notice any problems in a timely manner.
However, performing wall injections yourself also does not come without dangers:
- Wall injections are an effective method for fighting rising damp. However, it can be challenging to determine with certainty whether rising damp is actually the cause of the moisture problems in your wall. A thorough moisture analysis by experts is often needed to confirm this.
- Injecting a wall is a complex and invasive task that often requires experience and expertise. When you don't have adequate knowledge and skills, you run the risk of making mistakes.
- Moreover, mistakes can lead to worsening of the moisture problem or even cause additional damage.
- Finally, don't underestimate injecting walls. Injecting walls takes insight and patience. A wall can absorb 50 to 70 liters of moisture per meter, so it takes a long time to dry completely after treatment. Salpet formation can also occur in the interim, which also complicates the process.
Treating rising damp yourself: the conclusion
Although fighting dampness yourself is possible, it requires patience and precision. Nevertheless, we recommend hiring professional help, as it guarantees a correct execution and final solution. Due to favorable prices and a reduced VAT rate, professional moisture control is often not much more expensive.
Do you have a moisture problem, and suspect it could be rising damp? Our field engineers are true experts when it comes to this moisture problem. Contact AquaConsult now for a no-obligation free expertise.
Request more information and brochure
Answer the questions below and get more information and our brochure. Would you like to have the cost price calculated? Please indicate this clearly in the text field below and we will do the necessary.

AquaConsult's expertise in the media
We are excited to share the news that AquaConsult has been in the spotlight repeatedly over the past few weeks! As a company, we nurture a passion for moisture control and strive to make a healthy home a reality for everyone. It is therefore great to see our expertise recognized by reputable media companies.
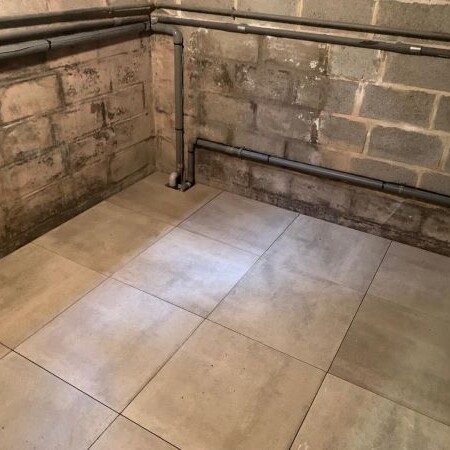
Wet Basements
We notice it more and more often. A lot of homes are experiencing damp to wet basements. This does not only include homes that are located on a street that has flooded. Even people who never had problems before are now facing damp basements. How does this happen? And why is this becoming more common?
This is why AquaConsult's expertise was called upon. Our manager Luc Lambrechts explained this topic to some well-known media companies.
In the Spotlight
AquaConsult's expertise appeared on several media outlets:
- VRT NWS: In a recent article titled "Exceptionally high groundwater levels: important for drinking water and agriculture, but it also has nasty consequences," we were interviewed. It was a great experience to share in-depth insights with the readers of VRT NWS.
- Nieuwsblad: Our business manager Luc Lambrechts gave a fascinating interview at Het Nieuwsblad. We discussed what's best to do when you have a wet basement.
- Radio 1: Our business manager was also interviewed to explain the extraordinarily wet first weeks of 2024.
- De Morgen: Finally, Luc received a phone call from De Morgen in mid-March, asking them some questions about the large number of inquiries regarding damp basements.
Our Thanks
Our sincere thanks go to VRT NWS, Nieuwsblad, Radio 1 and De Morgen for the opportunity to share our knowledge and insights. We appreciate the recognition and look forward to future opportunities to work together.
Discover More
Would you like to learn more about moisture problems and their solutions? Then be sure to take a look at our blog. Do you find yourself with a damp basement or experiencing another moisture problem? Then feel free to contact us and together we'll see what the best moisture solution is for you.
Request more information and brochure
Answer the questions below and get more information and our brochure. Would you like to have the cost price calculated? Please indicate this clearly in the text field below and we will do the necessary.
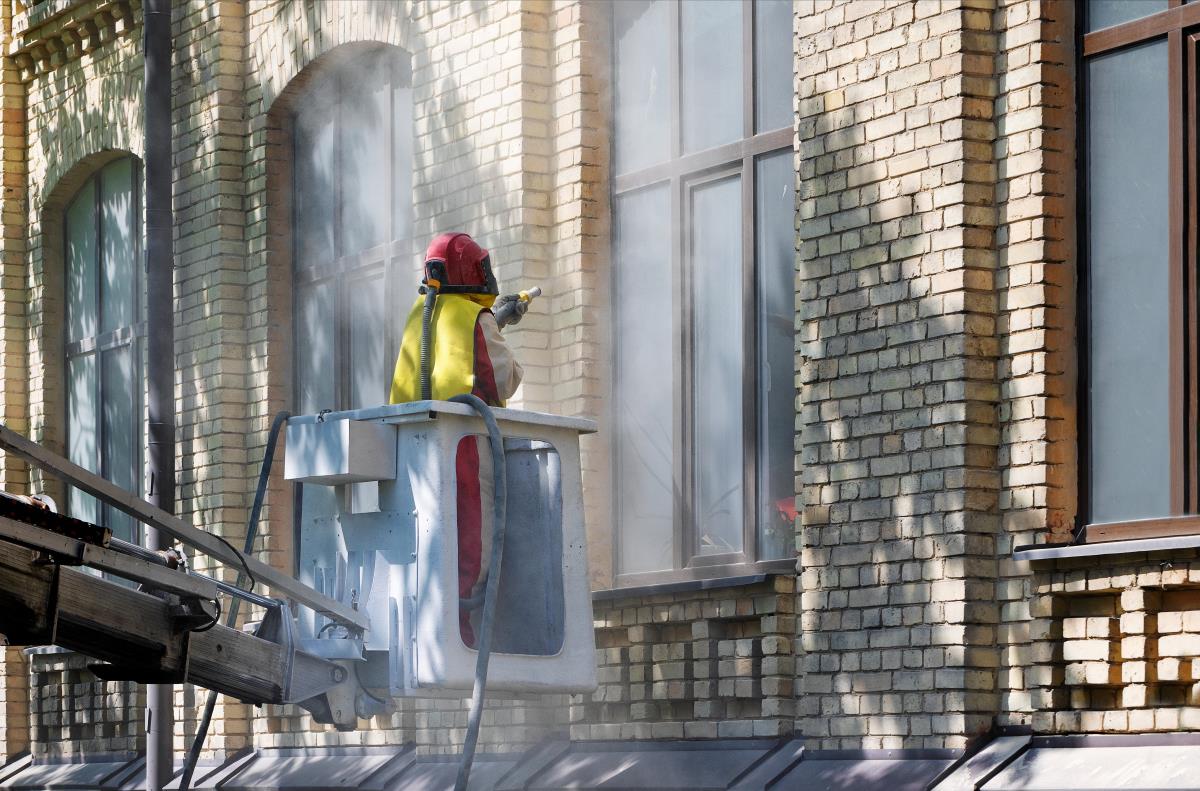
Hydrofuge: protect your facade from moisture
Your facade can suffer significant damage from moisture. An effective method of avoiding potential damage is to have hydrofuge performed. This blog will give you a comprehensive understanding of what hydrofuge entails and how it can protect your facade from the adverse effects of moisture.
This article answers the following questions:
- What is hydrofuge?
- What is the difference between hydrophobizing and impregnating?
- Why is it best to have your facade hydrophobized?
- How does your facade become water repellent?
- What does hydrofuge cost?
What is hydrofuge?
Hydrofuge is a form of facade treatment. This involves applying a type of treatment or coating to the facade with the aim of making this wall water repellent. The coating then forms a kind of protection for your facade, preventing penetrating moisture or the water from a leaking gutter from making its way inside, and consequently avoiding the adverse effects of these moisture problems. Hydrofuge thus offers an effective method for permanently protecting the facade from external influences.
Hydrophobizing versus impregnating
Commonly used synonyms for hydrofuge or hydrophobizing are facade impregnation or impregnating facades. However, there is a slight difference between the two terms:
- Hydrophobizing is a form of impregnation specifically aimed at making a surface water repellent.
- Impregnation, on the other hand, is a broader term. It refers to treating materials for various purposes, including improving water-repellent properties.
Why it's best to have your facade hydrophobized
What makes considering hydrofuge worthwhile? This is because this facade treatment brings a few benefits:
- Protection against external influences. Hydrofuge protects the facade from weather conditions, such as rain or frost, that can damage it.
- Avoiding moisture problems. The protective coating prevents penetrating moisture or water resulting from a leaking pipe from penetrating the facade.
- The facade also stays cleaner longer. Different forms of dirt, including moss, and mold, will have a much harder time forming. The dirt that forms will also be a lot easier to remove.
- The coating is also completely transparent, so nothing changes the appearance of the home.
- It also preserves breathability of the facade. This allows it to dry out properly without absorbing moisture.
Steps to a water-repellent facade: here's how hydrofuge works
Hydrophobing a facade involves several steps. Typically, a moisture expert proceeds as follows:

1. Inspection of the facade
The first step is a thorough inspection of the facade. It is essential to assess the current condition of the facade and determine if it is eligible for hydrofuge. During this inspection, any alternatives are also considered. For example, if the moisture expert determines that there is no penetrating moisture but rather rising moisture, hydrofuge is not the most appropriate solution. In such cases, injection of the walls is required.
The goal is to choose the most appropriate treatment method and ensure its effectiveness.
2. Taking precautions
Before the hydrofuge process begins, necessary precautions are taken:
- A thorough facade cleaning is carried out, making the exterior walls completely clean, grease and moss free. This is crucial for professional application and to obtain effective results.
- Window frames and windows should also be carefully protected to prevent accidental staining.
These preparatory steps are critical to ensure that the hydrofuge can adhere effectively.
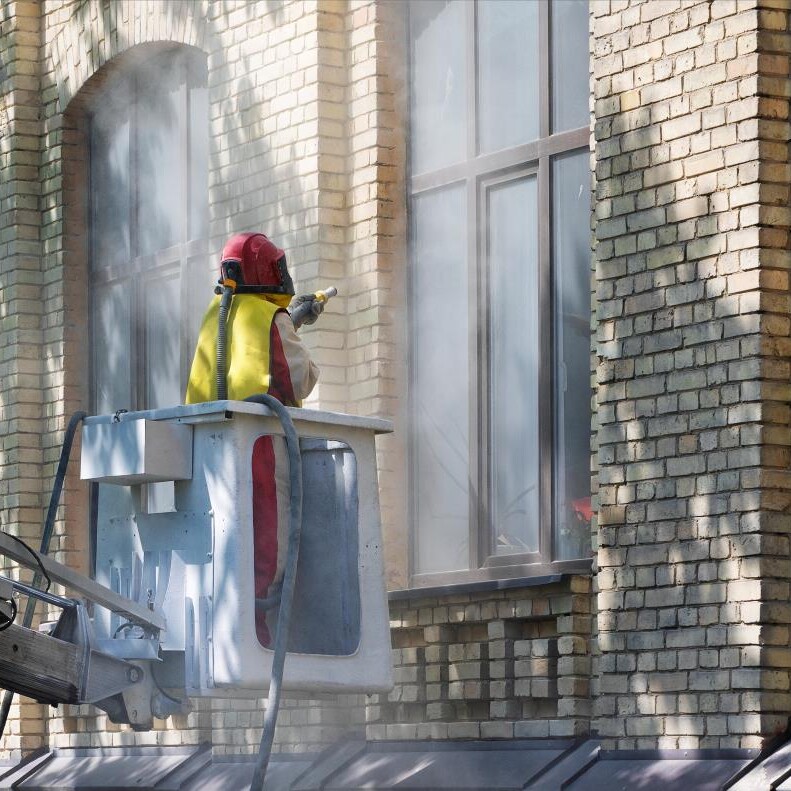
3. Hydrophobing
The application of the hydrofugant is the final step in the process. The product is sprayed over the façade. There are several types of hydrofuge on the market, including both chemical and biological varieties. The chosen hydrofuge then penetrates deep into the pores of the facade, and after drying out, it becomes completely invisible.
This water-repellent layer forms an effective barrier against moisture and other external influences, keeping the facade permanently protected. The result is a facade that is not only water repellent, but also stays clean longer and resists various forms of dirt, such as moss, algae and mold.
What does hydrofuge cost?
It is difficult to set a fixed price for a hydrofuge. In fact, there are many factors that can affect the price tag. Some of these factors include:
- The size of the facade
- The accessibility of the facade
- The specific product
- The cleaning of the facade
- ...
We recommend that you hire a professional to hydrofuge your facade. A professional can advise on the condition of the facade and whether a hydrofuge is the appropriate solution. In addition, a specialist is aware of effective products that provide long-term protection.
Do you have a moisture problem, and suspect it could be penetrating moisture? Our field engineers are true experts when it comes to this moisture problem. Contact AquaConsult now for a free, no-obligation expertise.
Request more information and brochure
Answer the questions below and get more information and our brochure. Would you like to have the cost price calculated? Please indicate this clearly in the text field below and we will do the necessary.
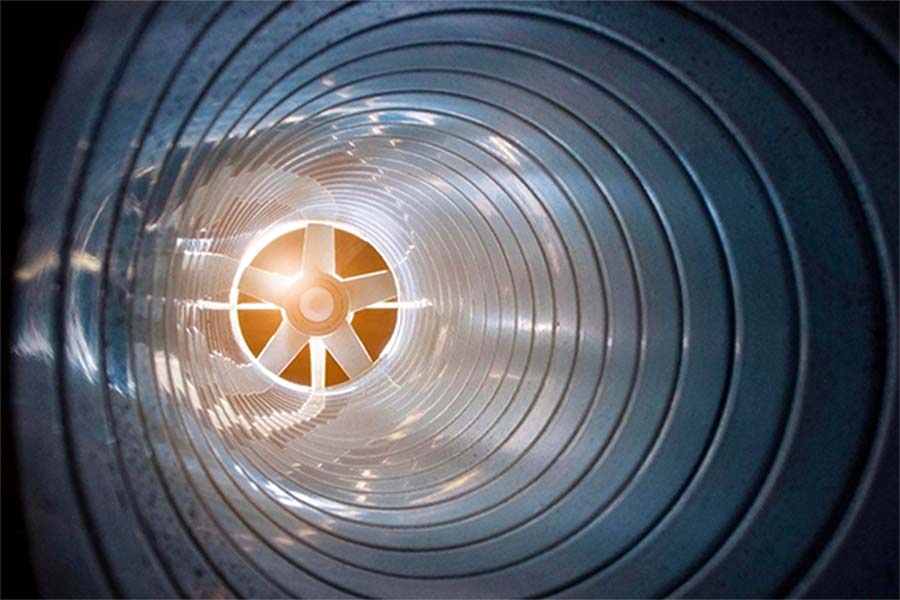
Mechanical ventilation: the solution to your moisture problem?
Ventilation is the process of removing polluted air and bringing in fresh, clean air. This is vital to prevent various long-term problems. An effective approach to this is the use of mechanical ventilation. But what exactly does this entail? In what ways does it help combat moisture problems? And how can mechanical ventilation contribute to the fight against corona virus? All your questions are answered in this article.
Why is proper ventilation important?
The average Fleming spends most of his or her time indoors. Nevertheless, we note that indoor air quality is often significantly less than outdoors. This is often true of basements, where ventilation is generally generally challenging. This brings with it all sorts of negative consequences:
- Without proper ventilation, all kinds of moisture problems can occur. Especially problems like condensation moisture are very simple to solve with ventilation. And do you solve condensation moisture? Then you can immediately do something against black mold.
- Poor ventilation can also cause a variety of health problems.
- Damp rooms are also harder to heat, so ventilating also helps you bring down that energy bill.
- In addition to preventing and solving moisture problems, ventilation is also very good for purifying the air in your home, making the air healthier and more pleasant to live in.
So thoroughly ventilating your home has only advantages.
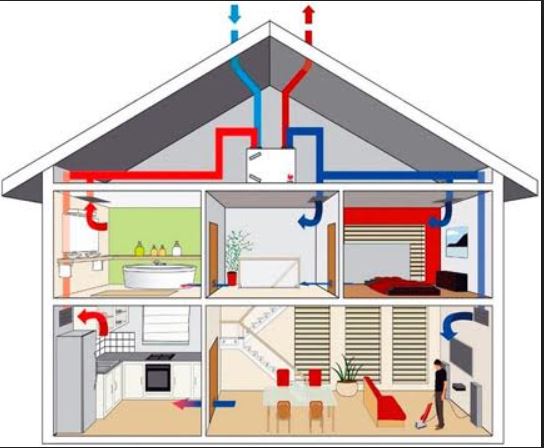
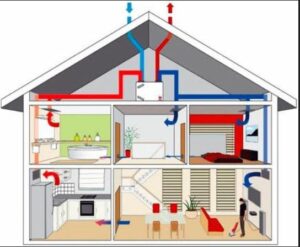
This is how you ventilate: the difference between natural and mechanical ventilation?
As already stated, through ventilation you remove polluted air and bring in fresh, clean air. With natural ventilation, this supply and removal occurs naturally. Grids embedded in the walls allow polluted air to go out while fresh air comes in through another grid. Or you open a window. That, too, is ventilation.
Still, natural ventilation is not always a good idea. Especially in well-insulated houses, this can be difficult, because everything was done there to keep the warm air in. Also, many people leave the ventilation closed in winter to keep out the cold air. At that time there is not even ventilation anymore.
There is also a big disadvantage to natural ventilation: you can't (or at least very difficult) regulate the supply and return of air, in winter cold air comes in, which makes your energy bill skyrocket.
With mechanical ventilation, these tricky points fall away and you can control the extraction and/or supply of air in a partially or fully mechanical way. Three different combinations are possible.
The different types of mechanical ventilation
Mechanical ventilation systems are divided into types from A to D. Ventilation system type A is natural ventilation, so we won't expand on that. Ventilation system type B is mechanical ventilation, but this form is rarely used in homes. We briefly review the details of ventilation systems type C and D.
Ventilation system type C(+)
Mechanical ventilation often refers to ventilation system C. This system is partly mechanical: the supply of air is natural, but its removal is mechanical. Two types can be distinguished in this:
- In a type C mechanical ventilation system, that exhaust of air occurs continuously.
- With a Type C+ ventilation system, the mechanical component is a whole lot smarter, and will exhaust air based on the CO² level or humidity in the room.
Ventilation system type D
Type D mechanical ventilation goes one step further. Here, both supply and exhaust are fully mechanical. There are several additional options, such as choosing a heat exchanger to save more energy. There is also the option of filtering for pollen and dust, which is especially beneficial for people with allergies.
With this type of mechanical ventilation, also known as balanced ventilation, the supply and return of air remains constantly balanced.
Which mechanical ventilation system is the best choice?
Now that you know the difference between mechanical ventilation type C and type D, let's briefly list the pros and cons.
- Type C is the more cost-effective option of the two, since only one fan is needed, more specifically for exhaust control. A Type D fan system typically consumes more energy, given that it supports two fans.
- Nevertheless, using a heat exchanger in balanced ventilation can help save energy. With Type C, more energy is lost in heating the colder air supply.
- Type D is distinguished by filtering the outside air for pollen and particulate matter. This results in improved air quality, allowing people with allergies to breathe more comfortably.
Both mechanical ventilation systems help against moisture problems anyway. If you ventilate properly, condensation moisture no longer has a chance. It only benefits your health.
We take on viruses
You can also have something else built into the balance ventilation: the GPS-FC24-AC, an ionization system. Such an ionization system sends electrons into the air that cling to particulate matter, pollen, but also germs such as those from the coronavirus. After a 60-minute exposure, covid-19 particles had decreased by as much as 90%.
This is one of the products officially approved by the Federal Public Health Service to be useful in the fight against coronavirus. Is the product not on that list? Then it is forbidden to be sold in Belgium.
Do you suffer from damp walls? Maybe mechanical ventilation could be the solution to your problem. Request a free moisture assessment now and we will help you find the best solution.
Request more information and brochure
Answer the questions below and get more information and our brochure. Would you like to have the cost price calculated? Please indicate this clearly in the text field below and we will do the necessary.
How can I re-waterproof my basement?
The basement is often the most humid place in the entire house. This space is usually located completely underground so this room is surrounded by soil moisture, and in addition, it is not obvious to properly ventilate a basement. As a result, all sorts of moisture problems can occur. If the problem persists for a long time, it can cause permanent damage to the structural elements of your home. Obviously, this is something you want to avoid.
It is therefore of great importance that you waterproof your basement. By doing so, you will not only create an additional more pleasant living space in your home, but also significantly increase the value of your home.
What are the symptoms of a damp basement?
First, it is important to determine if you are suffering from a damp basement. Several indications can point to basement moisture problems:
- There are damp spots on the walls or puddles on the basement floor. Salt circles or mold spots may also appear.
- The stuff in your basement is damaged.
- There is a musty smell.
A damp basement is not only unpleasant, it's anything but healthy. But there is a solution: have your basement waterproofed!
The causes of a damp basement
It is very important to have a specialist look at your basement. This is because there are two different diagnoses, each requiring a specific solution to waterproof your basement. Without expertise, it is difficult to determine which diagnosis is applicable.
1. A damp basement reasons other than infiltration
Is there no infiltrating moisture from outside, but you still have a moisture problem? Then condensation moisture from lack of ventilation is probably the big culprit. With a ventilation system and special basement paint, this is quickly solved. A leak in the pipes can also cause you to struggle with a wet basement.
2. A damp basement due to infiltration
If the cause of your wet basement is infiltrating moisture, then you will likely receive one of the following three common diagnoses:
- Permeable moisture occurs when external walls are no longer able to keep moisture out, especially during rainy periods. This problem can become severe, even penetrating interior walls, and can lead to freezing and cracking in winter.
- Another cause is groundwater, which can enter the basement due to a poor foundation or cracks in the walls.
- Finally, bagged or seeping water can sink down through the walls. This happens especially after heavy precipitation.
Only a specialist can say with certainty whether it is infiltrating moisture. Usually the solution here is to waterproof your basement. But how does such basement waterproofing work? There are two options for that.

Waterproofing your basement: the methods
Depending on the cause and situation, there are several methods to waterproof your basement.
Want to get rid of your damp basement for good? Then consult a specialist in moisture control. This professional is able to identify the exact cause of the problem and can recommend and implement the most appropriate solution.
Waterproofing the basement with the classic lining
In the moisture control world, the classic method of waterproofing basement walls is known as "basement waterproofing. In this approach, basement walls are waterproofed by cementing them. The basement waterproofing process involves several steps, including the application of fixing layers, quick cement and hydraulic waterproofing mortars. We summarize:
- First, moisture experts accurately assess the specific cause, extent of the moisture problem and groundwater pressure. To do this, the existing cladding is thoroughly removed to make the substrate clearly visible. This analysis provides an opportunity to estimate what solution is required.
- A waterproof plaster is then applied in several layers to both the basement walls and the floor.
- When fully cured, these layers combine to form a strong and moisture-resistant barrier.
- This waterproof layer prevents rainwater or soil moisture from seeping in.
Waterproofing the basement with basement drainage
In a conventional basement drainage procedure using the traditional method, a pump house is embedded in the floor to collect water, followed by the application of bubble wrap. This proceeds as follows:
- The bubble liner contains a specific structure of small channels. These channels serve as a means of collecting groundwater and directing it to a central drainage pit. This drain pit is strategically placed at the lowest point of the basement.
- A water pump then pumps the water out of the collector through a drain, often equipped with sensors for automatic operation.
- Finally, the moisture expert applies a new concrete layer on top of the studded membrane. By efficiently draining groundwater under this new floor, floor drainage is a sustainable solution that also remains invisible.
Waterproof the basement with AquaConsult's unique process.
Finally, AquaConsult offers a unique method of waterproofing a basement. Again, we place a pump house in the floor where the water is collected and after several measurements, we adjust the floor with a laser. Then we install certified ceramic tiles that measure 60 x 60 x 2 inches. What's nice? You can choose the color of the tiles yourself.
There are three major advantages to this method of basement waterproofing:
- First of all, you lose less height than with the classic casing. Here we are talking about a maximum of 5 centimeters, whereas with the casing you easily lose 8 centimeters.
- It is also much more stylish. This is certainly interesting if you want to turn your basement into a real living space.
- The final advantage is the price: the cost of a classic casing is quite a bit higher than that of ceramic tiles.
Are you suffering from a damp basement? Contact the experts at Aquaconsult now for a free moisture assessment and we will be happy to help you.

Damp-proof paint: everything you need to know
What is moisture-resistant paint?
Damp-proof paint, as the name implies, is a type of paint specifically designed to repel moisture. This type of paint usually contains a water-repellent compound. This ensures that after the paint dries properly, a barrier is created between the paint and moisture. This prevents moisture from penetrating the walls.
With the naked eye, you often don't notice the difference from ordinary wall paint. Yet it has a number of additional advantages:
- Your wall will (of course) be moisture-resistant or water-repellent;
- Your wall will be easier to dry and clean;
- And your wall will be extra protected from mold.
When do you need moisture-resistant paint?
Damp-proof paint is a useful tool in many different situations, but not all of them. We explain when damp-proof paint is a good idea:
- As a preventive measure. Would you like to protect the walls of rooms where a lot of moisture occurs, or would you like to protect your exterior walls from possible moisture penetration in the future? Then it is interesting to apply a coat of moisture-resistant paint to your kitchen, bathroom, basement or facade.
- As a post-treatment for moisture problems. Do you suffer from damp walls or mold in your home? Then in all probability you are dealing with a moisture problem. Think for example of leaking or rising damp. After finding the cause, addressing it and letting the solution do its job properly, you can apply damp-proof paint as a kind of additional moisture control agent.
Note that moisture-resistant paint is not a quick fix or magic solution. For example, if you experience a moisture spot on a wall, painting it over is usually not an appropriate or permanent solution. The moisture will simply return over time. Worse, the problem may just get worse. Therefore, we recommend that you first determine the actual cause of the moisture, and apply the most appropriate moisture solution. Do not hesitate to call in a moisture expert, as this guarantees the best treatment.
The types of moisture-resistant paint
Is damp-proof paint right for your situation? Then, broadly speaking, you have two options. Namely, we broadly distinguish between two types of damp-proof paint:
- Interior waterproof paint. This type of damp-proof paint is specifically designed for interior walls. By applying a layer of this paint to the interior wall, moisture cannot penetrate the wall. This is especially interesting for damp rooms, such as a bathroom, kitchen or basement.
- Exterior water-repellent paint. This variant is intended only for the exterior walls of a home. Here the paint forms an additional protective layer against penetrating moisture.

Which damp-proof paint is best to choose?
There are plenty of alternatives on the market. Which damp-proof paint you best choose depends on the situation. Get advice from an expert. Our moisture experts recommend the moisture-resistant Tensiocoat of Rewah NV. We have trusted this brand for a long time, also for injecting walls.
How do you apply moisture-resistant paint?
You have no underlying moisture problems (anymore), you know which walls you want to paint, and you've chosen a moisture-resistant paint. You can finally start the real work! Typically, you (or a professional painter) will follow these steps:
- Preparation. We repeat it again because it's so important: the moisture problem must be completely eliminated before you can start painting. In addition, your walls must be clean and dry.
- Painting. Damp-proof paint usually applies like regular paint. In most cases, two coats are sufficient. If necessary, apply a primer beforehand.
- Drying. Allow the paint to dry completely.
Are you suffering from moisture in your home? Then don't delay and request your free expertise. Our moisture experts will be happy to visit you.
Four ways to prevent mold in the home
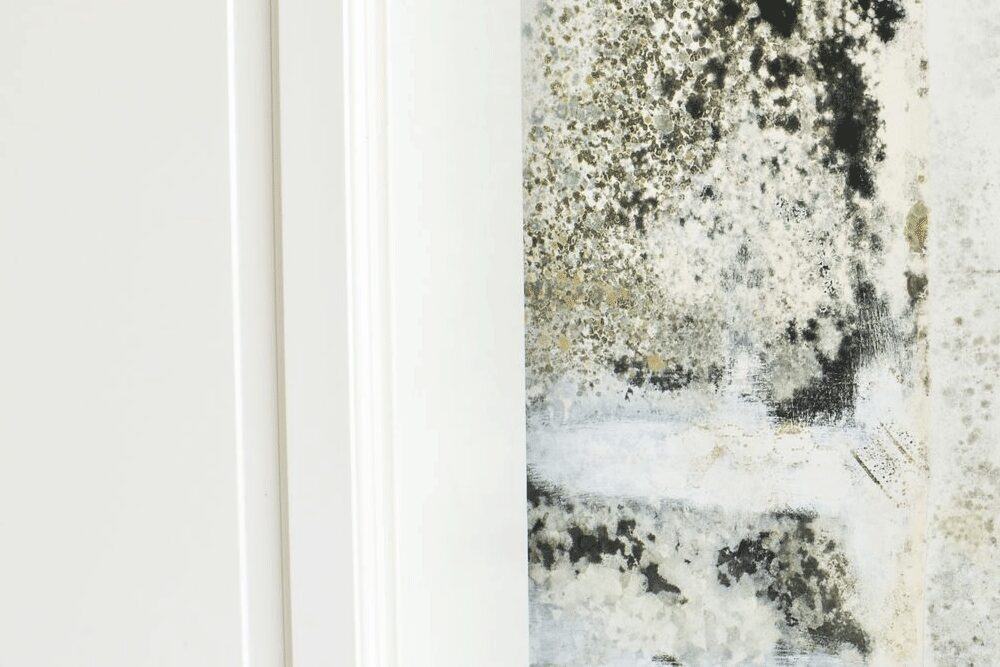
Mold on the wall is a big problem. It is the cause of problems to your home as well as to your health. There are ways to make your home mold free. AquaConsult is happy to help you.
How do molds form?
Mold on the wall needs moisture to grow and survive. Therefore, they arise in places in the house where there is higher humidity. For example, the basement, kitchen and bathroom are the main places in the house for the development of mold, and this is initiated primarily by human activities that lead to condensation moisture:
- There is often a lot of steam in the kitchen from boiling water.
- In the bathroom, moisture is created by the hot water from the shower or bathtub.
- Various moisture sources easily find their way into the basement, but because of a lack of ventilation, it is difficult for the moist air to escape from the basement.
Underlying moisture problems such as rising damp or leaking damp can also lead to mold over time. Leaks or broken downspouts can also be the culprit. In this way, moisture from outside can also make its way inside. Do you notice mold in your home? If so, be sure to contact a moisture expert to find out what is causing it.
Why do I need to prevent mold in my home?
First of all, it is important to know why you should prevent mold. After all, mold is associated with all sorts of negative consequences, on the one hand for your home and on the other for the health of you and your family members.
- As mentioned earlier, mold can cause damage to your home; especially in an advanced state. The mold then settles on wood or in the wall. The longer the mold has time to grow, the weaker that wall becomes.
- Mold is also a detriment to health; especially for children, the elderly and those with underlying lung or respiratory conditions. The biggest culprit here is black mold due to the mycotoxins they secrete. Common health complaints after mold exposure include nausea, headaches, breathing problems, coughing fits, allergic reactions or irritated skin.
Removing mold on the wall is not an easy task either. So it is better to prevent than to cure.
How do I prevent mold in my home?
There are several ways to prevent mold in the home. We list the most important ones here.
1. Adjust your habits
As mentioned earlier, mold occurs in the most humid places in the house, such as the kitchen or bathroom. By adjusting your habits a bit, you can easily prevent mold:
- One of the most important habits to prevent mold is drying your bathroom after you shower. Showering creates a lot of steam in the room, and that moisture can soak into the walls if you don't make sure the walls are dry.
- In addition, it is recommended that you always put on your cooker hood when you cook.
- Carpets in damp rooms also retain moisture, which in turn can promote mold. Limit placing carpets in these areas, or make sure you let your bath mat dry regularly.
2. Pay attention to the humidity in your home
Is the humidity in the house above 60%? Then the humidity in the house is too high, so moisture does not have a chance to dry out. So it is much more likely that moisture will soak into the walls, giving mold free rein.
You can easily keep an eye on your home by using a hygrometer. This measuring instrument is designed to keep track of the humidity in your home. A thermometer can also be a help, as a room that is too humid is often harder to heat. Do you notice it's harder to get your home to the desired temperature during a cold fall or winter day? If so, this could be due to increased humidity.
3. Address moisture problems in time
As briefly outlined above, mold in the home is one of the many symptoms of a moisture problem. It is important to address moisture problems as soon as possible so that mold does not have a chance to develop.
Think you are suffering from a moisture problem? Then contact Aqua Consult and we will help you as soon as possible.
4. Ventilate the room
The biggest and easiest way to prevent mold is ventilation. On the one hand, this can be done simply by opening your windows for about 15 minutes every day, but on the other hand, a mechanical ventilation system can also help. This system is then installed in the rooms most likely to cause moisture problems; such as the bathroom and kitchen. With a balanced ventilation, you regulate the air in your home yourself.
Too late ... How to remove mold?
Did you find this article just too late, and you still notice mold spots on your walls or ceilings? If so, it is obviously important to remove the mold in your home.
You can remove mold from the wall yourself if they are small, scattered spots. Use baking soda and water or buy a fungicide. When doing this, always make sure to protect yourself with a mouth mask and gloves. For large mold spots on the walls, it is advisable to hire a professional such as AquaConsult because they not only remove the mold but also address the underlying cause.
Do you think you are suffering from a moisture problem? Or would you like to have a mechanical or balanced ventilation system installed? Wherever you live; Aqua Consult is here for you. Contact us now and we will contact you within 24 hours.
Air-to-air heat pump: cool and heat with ease
Having an air-to-air heat pump installed?
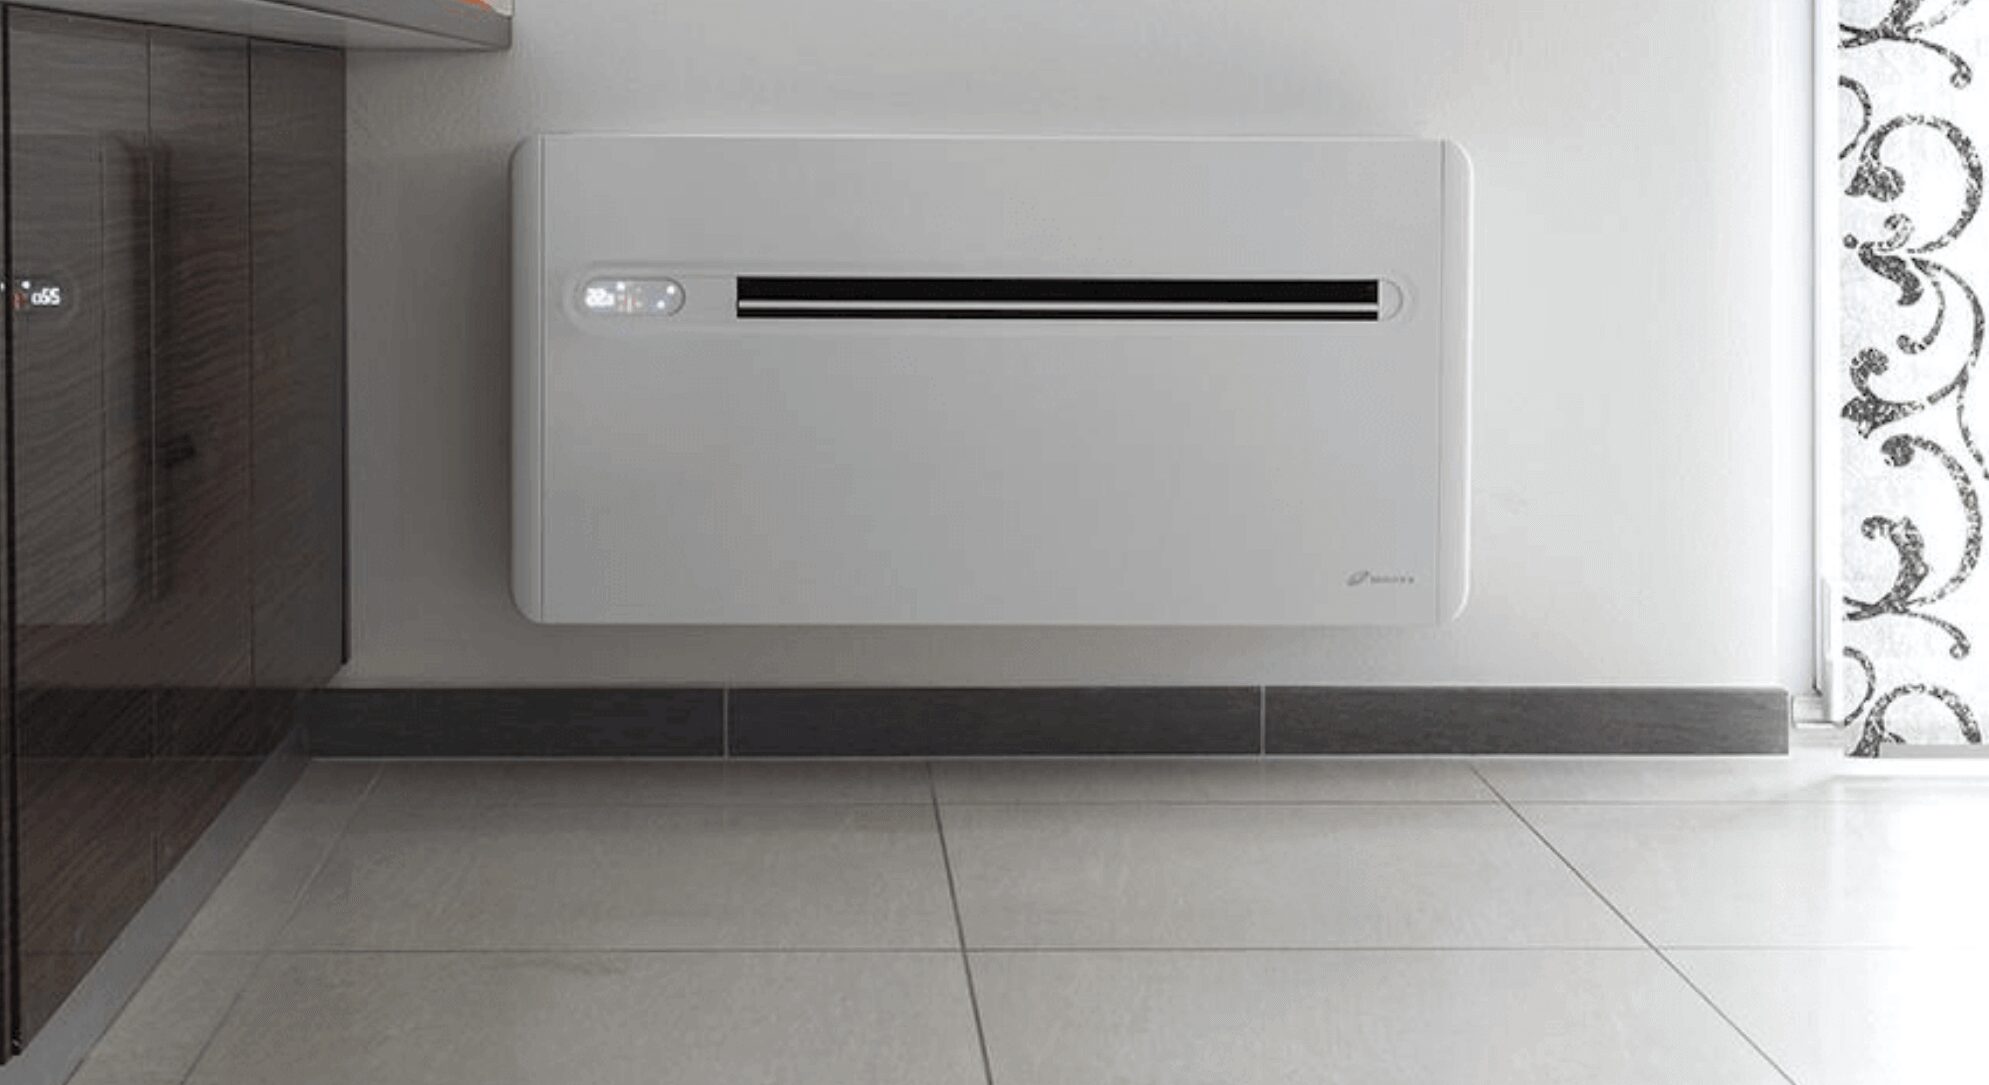
An air-to-air heat pump is a type of heat pump that allows you to both heat and cool your indoor space. So it is similar to an air conditioning system, but with more options.
This type of heat pump is mainly known in the form of a monoblock air conditioning system: an air conditioning system where there is no outdoor unit. It is very popular because of its cost-effectiveness and relative simplicity of installation. Find out all about an air-to-air heat pump in this article.
Quickly find your answer:
- Is an air-to-air heat pump for you?
- How does an air-to-air heat pump work?
- Advantages and disadvantages of an air-to-air heat pump without an outdoor unit
- The price of an air-to-air heat pump
When is an air-to-air heat pump interesting?
An air-to-air heat pump is a convenient system for temperature control, but it is important to know when it is an appropriate choice. Here are some situations when considering an air-to-air heat pump makes sense:
- When you want both heating and cooling.
- Replacement for an electric heating system. If you currently have electric heating, switching to an air-to-air heat pump can save costs and be more environmentally friendly.
- As a new central heating system. For homes without central heating, an air-to-air heat pump can be a good option, especially in smaller homes where individual temperature control in each room is desired.
- In small and well-insulated homes. An air-to-air heat pump is efficient in well-insulated, small homes where heat retention is good.
However, there are situations where an air-to-air heat pump is less suitable, such as in poorly insulated homes, large homes that require multiple (indoor) units, and when there is no suitable space for both the indoor and outdoor units. In general, an air-to-air heat pump is best suited as supplemental heating or in smaller, well-insulated homes.
How does an air-to-air heat pump work?
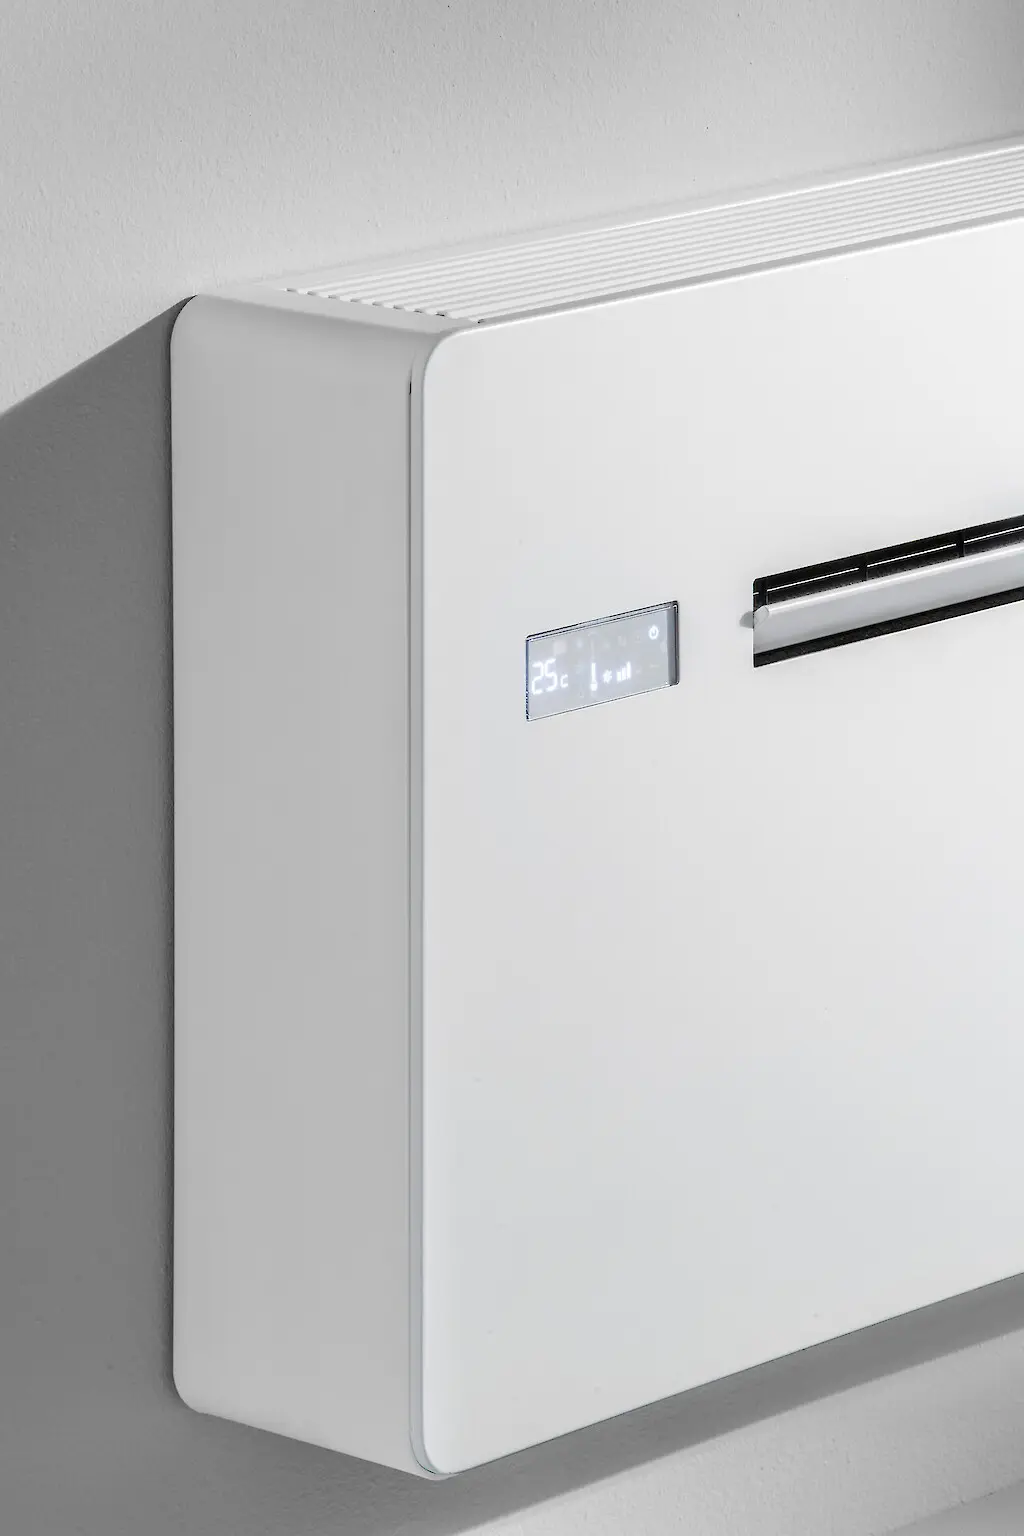
When an air-to-air heat pump heats a room, it draws in indoor air using a fan. A compressor located inside the unit compresses the refrigerant gas, raising its temperature. This heated gas then passes through a heat exchanger, transferring the heat to the air. This heated air is blown into the room, and this is repeated until when the room is at the desired temperature. Cooling a room proceeds in just the opposite manner.
The pros and cons of an air-to-air heat pump without an outdoor unit
There are an awful lot of advantages to an air-to-air heat pump without an outdoor unit. Here are some of the many advantages:
- You can easily and quickly heat and cool your indoor spaces.
- An air-to-air heat pump is also available without a visible outdoor unit.
- The unit is easy to install.
- You lose little space.
- Air-to-air heat pump is much cheaper than an air conditioning split system.
- In summer, with the air-to-air heat pump, combined with the digital counter (with solar panels) you can cool the house for free at the cost of the sun.
There are also a few (more limited) drawbacks to mention:
- Not suitable for all homes or situations.
- When it is very cold outside, the efficiency is a bit lower.
- An air-to-air heat pump cannot be connected to an existing heating system.
Are you considering an air-to-air heat pump?
Are you considering buying an air-to-air heat pump? A wise idea: you'll find the best value for money with this type of air conditioner.
AquaConsult specializes in air conditioners without outdoor units with this air-to-air heat pump technology. For this, we work with our sister company AeroConsult, which specializes in monoblock air conditioners and heat pumps (both for air and domestic water). These air-to-air heat pumps can also be coupled with ionizers. This is one of AeroConsult's strengths: we offer the ability to add additional air purification. Our ionizers remove all impurities from the air, including bacteria, viruses, pollen and particulate matter.
How much does an air-to-air heat pump cost?
Are you considering installing a monoblock air conditioner without an outdoor unit? Then request more free information on price, maintenance, installation, energy consumption and functions for winter and summer. The price depends on the area of the room and the type of installation. Therefore, ask one of our air conditioning specialists for all options without obligation.
How do I maintain ideal humidity in my home?
How pleasant the indoor air in your home feels is often related to humidity. Is the humidity in the house too high or too low? Then it can cause ailments and health problems as well as damage to your home. But what is the ideal humidity level? And how do you check it?
What is humidity?
By (relative) humidity we mean the number of particles of water vapor circulating in the air at any given time. A good humidity is between 40% and 60%. The air at that time consists between 40% and 60% of particles of water vapor. The ideal level of humidity in the house is 50%.
What if the humidity in the house is not right?
There are two possible scenarios: the humidity in the home can be either too low or too high. Each of these situations has its own consequences.
What are the consequences of too low humidity?
When humidity is too low, the air in the house is too dry and the relative humidity is below 40%. Low humidity is especially common in winter because the cold air contains less moisture. Typically, too low humidity can cause the following:
- Because of dry air, you may suffer from minor ailments such as cracks in your lips, dry eyes, headaches and irritation to your mucous membranes or your airways (which manifests as an itchy cough). It can also make it harder for you to concentrate and make you more tired.
- It can also cause minor damage in your home in the form of cracks in woodwork, such as the floor or furniture.
Nevertheless, too low humidity in the home is not a major problem. The problems really start when the humidity is too high.
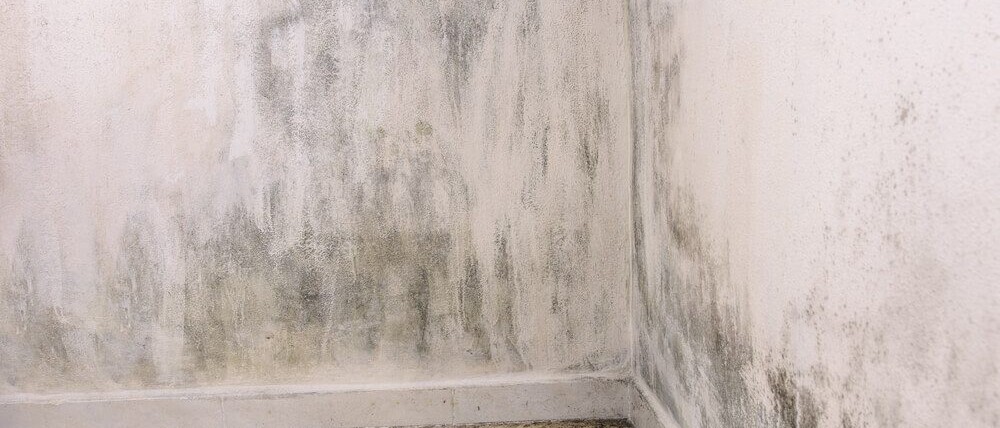
What are the consequences of excessive humidity in the home?
Is your humidity too high? Then the relative humidity is higher than 60%. There are many different possible causes for this, many of which are not always easy to detect. Everyday activities from washing, cooking, ironing to simply breathing and perspiring contribute to increased humidity. In fact, scientific studies show that an average family produces up to 15 liters of excess moisture per day. That's not nothing! But an underlying moisture problem can also cause humidity levels in the home to be too high.
The consequences of too high humidity in your home are worse than those of too low humidity; both for your home and for your own health.
- You will often notice condensation moisture in heated spaces such as your living room or bathroom. There is always a movement of air between a warm and unheated room. Because of the lack of (mechanical) ventilation, this moist air will condense in the colder rooms, and more specifically on cold surfaces.
- Damage to the house may follow. This usually comes in the form of mold on the walls, loose plaster or wallpaper, wood rot and dust mites and other pests popping up. Such issues are especially prevalent in the bathroom. That air always has high humidity - due to your washing - and is very prone to problems such as dampness and mold. So when you know that some mold in the home secretes extremely toxic substances, you want to avoid it at all costs.
- Also, the air smells musty.
- In addition, your energy bill may be skyrocketing. This is because a humid room is much more difficult to heat than a room with normal humidity. Studies show that you need to use 20% more energy to heat a humid room.
- Are you already suffering from underlying conditions? Then excessive humidity can cause a lot of health problems. Excessive humidity worsens conditions such as rheumatism or asthma, dust mites can trigger allergies, and children, the elderly or those with weaker immune systems can suffer additional respiratory and pulmonary problems. Especially since excessive humidity means there is not enough fresh air and oxygen in the air.
So it is not a luxury to do something if you suffer from excessive humidity in your home.
Measuring humidity
You can measure the humidity in your home yourself using a hygrometer. This is a measuring instrument specifically designed to measure humidity levels in the home. This can help you understand humidity levels in the indoor environment.
To ensure an accurate reading, it is important to place the hygrometer correctly. You obviously want to get a representative reading of the humidity so that you can take appropriate action if the air turns out to be too dry or too humid. That's why we recommend not placing the hygrometer on the wall of an exterior wall or near a window. This is because the humidity near external walls and windows often differs somewhat from the rest of the house.
A hygrometer is available these days for as little as 15 euros. Usually these handy devices also have other useful functions.

How can I optimize humidity in my home?
Tips for better humidity in the home
- Ventilating your home adequately is always a good idea. Open your windows for about 15 minutes daily, and ventilate extra when cooking or showering.
- If the increased humidity is confined to one room (for example, a damp bathroom or bedroom), an exhaust system or dehumidifier can help.
- Always turn on your cooker hood while cooking and also clean it regularly.
- Cook with lids as much as possible, try to dry your laundry outside as much as possible, and wait a while to open your dishwasher when it's done.
- Sometimes an abnormal humidity in your home is not caused by poor ventilation, but by an underlying moisture problem. In such cases, it is advisable to take appropriate moisture control measures in addition to your ventilation system. It is wise to enlist the expertise of a professional for this purpose.
A universal and definitive solution: balanced ventilation
The best optimal solution, in other words the solution that guarantees the best humidity in the home, is to install a mechanical ventilation system, preferably a balanced ventilation. With a balance ventilation, you have total control over the air in your home. Does the indoor air have excessive humidity? Then you can easily take that air outside and bring in fresh air. Not only does this help control the number of water vapor particles in the air in your home, but it also provides fresh air with plenty of oxygen. Things that allow you to breathe better and thus make your lungs and airways less likely to suffer.
Are you suffering from excessive humidity somewhere in Flanders? Contact Aquaconsult now and our experts will be happy to help you.